Installing Trace
Pre-requisites
Trace is an add-in that works only in Microsoft Excel version 2003 onwards (including version 2007). Additionally, Trace works only in the Microsoft Windows operating system.
Trace also requires Graphviz software from AT&T Research Lab to work. The Graphviz setup file is included in the Trace archive file, but it is recommended that you check Graphviz's website for the latest version. This is to ensure you will obtain the latest version of Graphviz, which may have improvements in speed and bug fixes. Graphviz can be downloaded for free from: http://www.graphviz.org/Download_windows.php. Ensure you download the Graphviz for Windows version.
Steps to install:
- Unpack Trace archive, and install Trace in Excel
- Install Graphviz
Unpacking Trace archive
Use Windows Explorer to find and double click the Trace.zip file. Unpack the contents in any location you wish (Figure 1). I recommend that you save Trace files in a separate folder, e.g., "C:\Trace\".
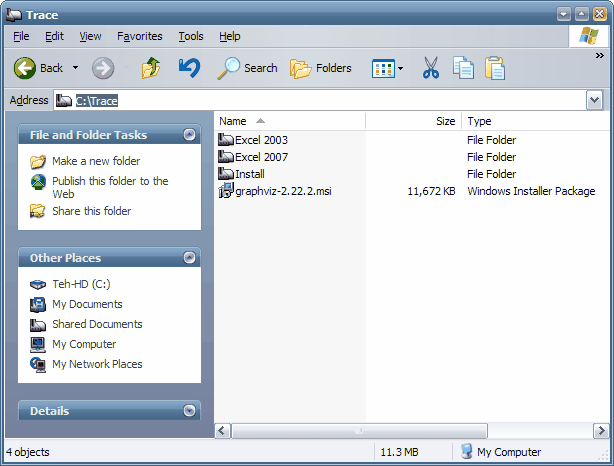
Figure 1. Suggested location for Trace files
Folder Excel 2003 stores Trace for Excel 2003, and folder Excel 2007 for Trace for Excel 2007 onwards. Folder Install contains files for displaying help on installing Trace, including this file. Also included is the Graphviz setup file. Again, you are advised to check Graphviz download site for the latest version. The setup file included here may not be the latest version by the time you read this.
Installing Trace Add-in in Excel
Installing in Excel 2007
Click the Office button (Figure 2), and choose Excel Options (Figure 3).

Figure 2. Excel's Office button
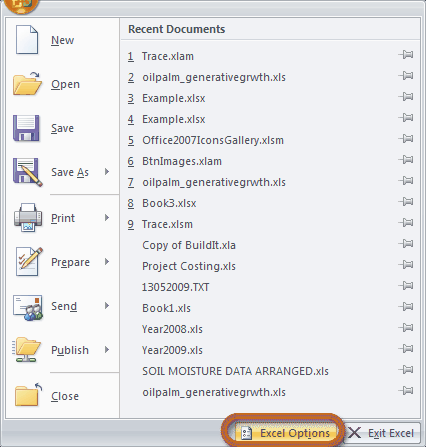
Figure 3. Choose Excel Options
You will then be presented with a list of Excel's options. Click Add-Ins, and under Manage, choose Excel Add-ins, and click the Go... button (Figure 4).
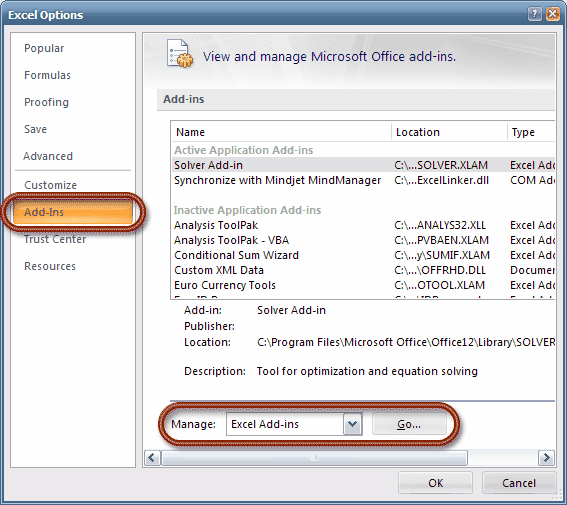
Figure 4. Manage Add-ins
You will be presented with another list. This list contains all the add-ins recognised by Excel (Figure 5). If you have saved Trace's files in the default add-in location, you will see the name Trace on this list (Figure 6). However, if you do not see Trace on this list (i.e., name missing), do not worry. It only means that you have saved Trace in a non-default location.
Click the Browse... button (Figure 5) to specify Trace's location/folder (e.g., C:\Trace) to Excel. Once you have found Trace's location, you will see Trace's name on the list (Figure 6). Ensure the check mark appears next to Trace's name.
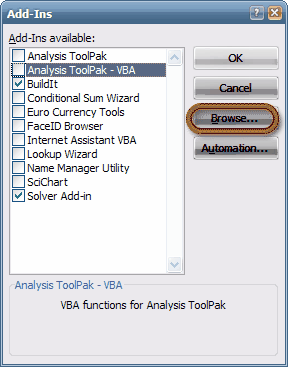
Figure 5. List of Add-ins
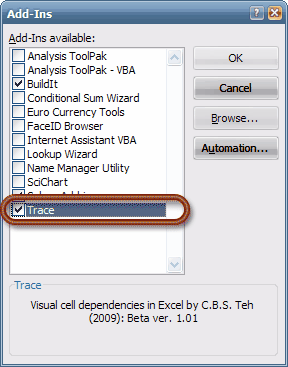
Figure 6. Trace on the list of add-ins. Ensure Trace's check box is ticked.
Click the OK button (Figure 6), and once installed, Trace's menu will appear on the Ribbon (Figure 7). Trace is now ready to use each time you open Excel.

Figure 7. Trace's menu on Excel's Ribbon
Installing in Excel 2003
On the main menu bar, click Tools and then Add-Ins... (Figure 8).
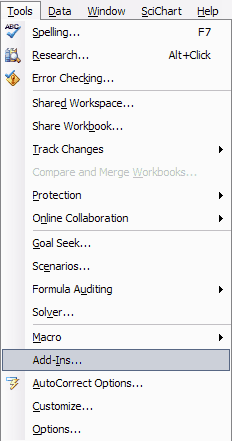
Figure 8. Managing the add-ins in Excel 2003
You will see a list of add-ins recognised by Excel (Figure 5). If you have saved Trace's files in the default add-in location, you will see the name Trace on this list (Figure 6). However, if you do not see Trace on this list (i.e., name missing), do not worry. It only means that you have saved Trace in a non-default location.
Click the Browse... button (Figure 5) to specify Trace's location/folder (e.g., C:\Trace) to Excel. Once you have found Trace's location, you will see Trace's name on the list (Figure 6). Ensure the check mark appears next to Trace's name.
Click the OK button (Figure 6), and once installed, Trace's menu will appear on the main menu (Figure 9). Trace is now ready to use each time you open Excel.

Figure 9. Trace's menu on Excel 2003 main menu
Installing Graphviz
Double click the graphviz's setup file (e.g., graphviz-2.22.2.msi), and follow the instructions.
Christopher Teh Boon Sung, Serdang